Basic Tutorial -- part 1: static configurations
Before you start...
Before you start this tutorial, please make sure that you have followed the instructions on our Quick Start page and have installed everything which is required for this tutorial.
What is it about?
In this tutorial, we will build a LD-R application on top of the DBpedia knowledge graph -- extracted structred information from Wikipedia. The tutorial will show how the basic configurations in LD-R can be applied to view, edit and browse Linked Data.
Let's start!
Go to the directoy where you have installed your LD-R instance and open your favorite code editor (I usually use Atom editor which brings a set of nice features for Web development and it per se is built with React technology. To launch the Atom editor, I simply runatom . on my project directory.).
In order to develop and see the results in parallel, run the npm run dev command.
* If you are a windows user, you might need to try npm run dev:windows instead!
This command will start the Node server and will watch your code for possible changes. It will thereby refresh the pages/components automatically without re-running the command or refrshing the browser page.
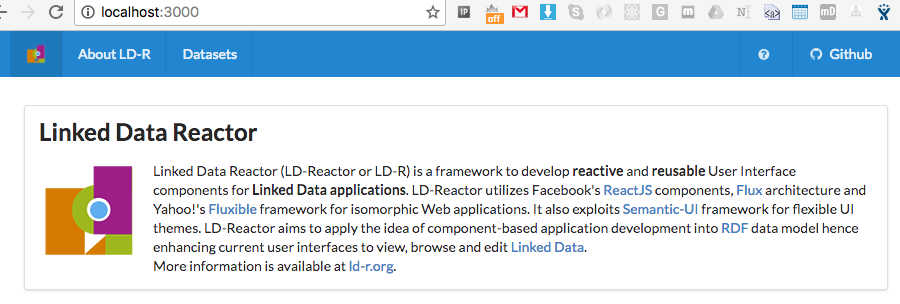
Once the Node server is on, If you now go to the http://localhost:3000 in your browser you should see the home page of the LD-R:
If you click on the Datasets, you should see the following message:
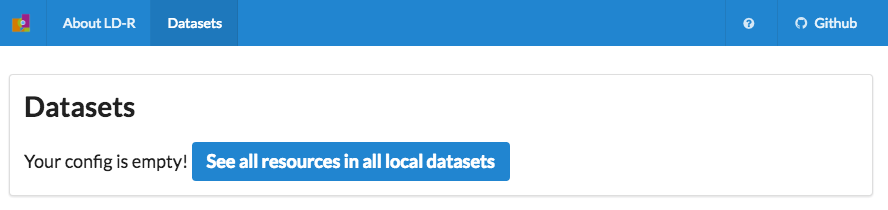
This means you still haven't defined any datasets to view, edit or browse. OK, it is time now to add some configs in there!
The first config you need to set is in the configs/server.js in order to be able to connect to a SPARQL endpoint.
The default server configuration looks like this:
export default {
    serverPort: [4000],
    sparqlEndpoint: {
        'generic': {
            host: 'localhost', port: 8890, path: '/sparql', endpointType: 'virtuoso'
        }
    },
    dbpediaLookupService: [
        { host: 'lookup.dbpedia.org' }
    ]
};
There is always a 'generic' configuration for the SPARQL Endpoint which will be used in case no other configurations are defined. It means if you already have a triple store such as 'Virtuoso' installed/running on your localhost, you can use it right away. For our tutorial, let's add a new endpoint configuration for DBpedia:
export default {
    serverPort: [4000],
    sparqlEndpoint: {
        'generic': {
            host: 'localhost', port: 8890, path: '/sparql', endpointType: 'virtuoso'
        },
        //added a new endpoint
        'http://live.dbpedia.org/sparql': {
            host: 'live.dbpedia.org', port: 80, path: '/sparql', graphName: 'default', endpointType: 'virtuoso'
        },
    },
    dbpediaLookupService: [
        { host: 'lookup.dbpedia.org' }
    ]
};
I have chosen to use the live dbpedia endpoint for this tutorial but you can also use http://dbpedia.org/sparql as well (if it is up and running!). The type of triple store is 'virtuoso' and I will use the default graph for data. If you don't specify the default graph name, the identifier for the endpoint (in this case 'http://live.dbpedia.org/sparql') is used as the graph name. More info about the possible parameters and values for server config is available here.
It was all about connecting to the DBpedia triple store. Let's now add our first reactor configuration:
Open the configs/reactor.js file in your editor and add the placeholder for our DBpedia graph:
        //---------depth 1------------
        dataset: {
            'generic': {
                resourceFocusType: [],
                //only allow to view data -> disable edit
                readOnly: 1,
                //used for pagination in resource list
                maxNumberOfResourcesOnPage: 20,
                datasetReactor: ['Dataset']
            },
            //adding configs for dbpedia
            'http://live.dbpedia.org/sparql': {

            },
            'http://ld-r.org/users': {
                readOnly: 0
            }
        },
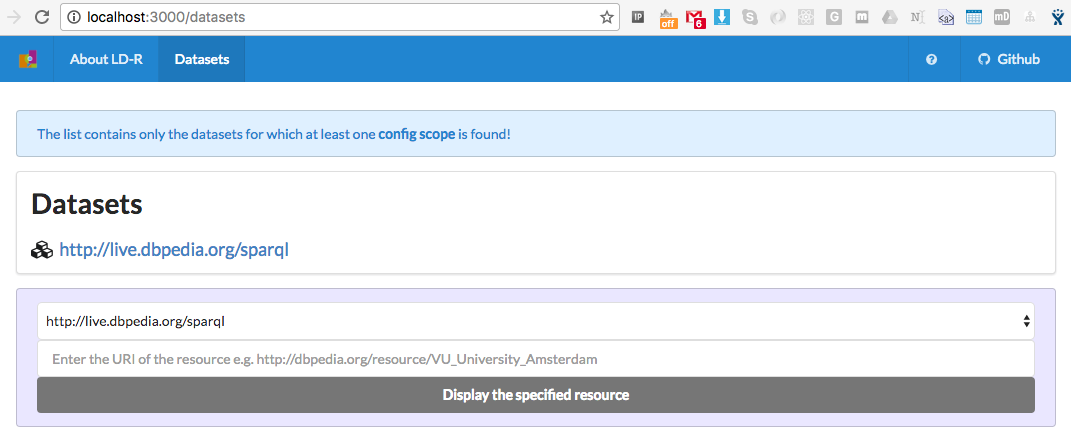
LD-R supports configurations in different levels. With the above lines, we set the configs for datasets. Now, if you visit http://localhost:3000/datasets, you should already see the DBpedia graph listed there:
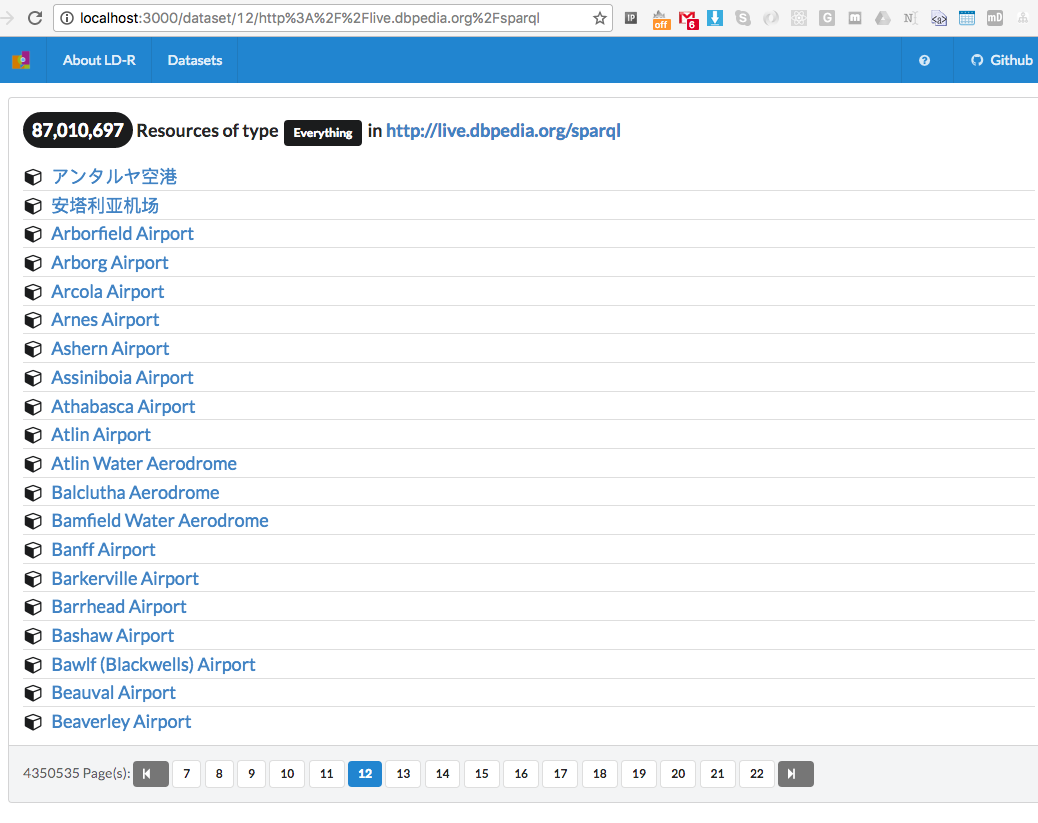
and by clicking on the dataset, you should already get a long list of all resources on DBpedia:
you can also click on the resources and see their data displayed by the basic LD-R rendering.
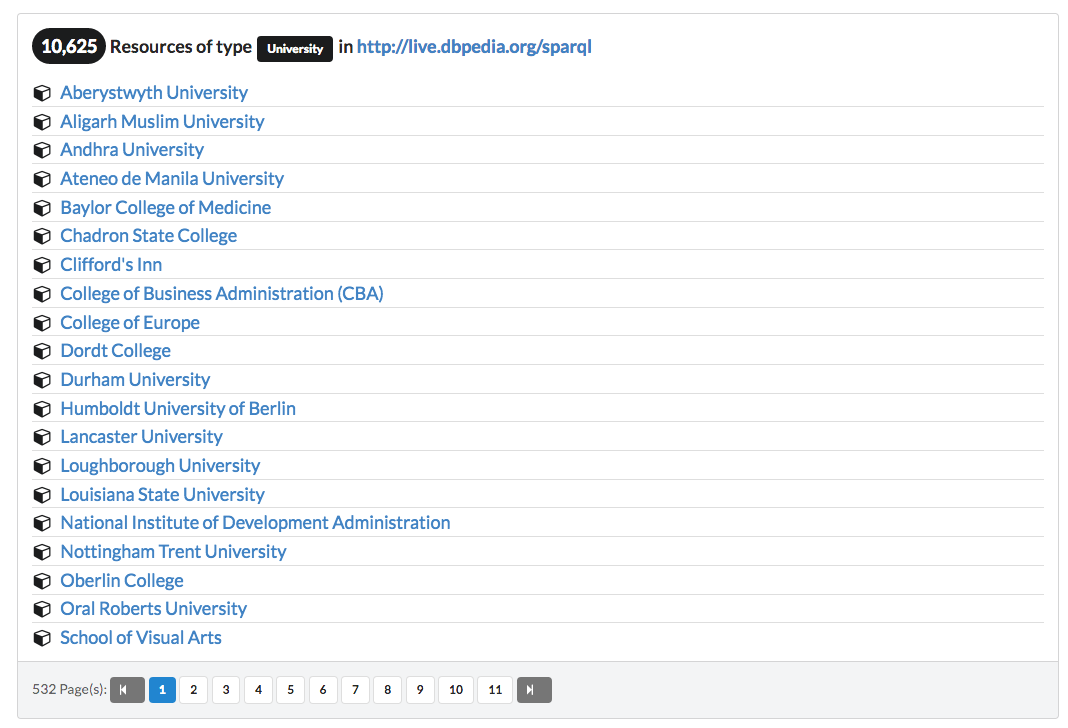
Let's tell the LD-R to only list the resources of a certain type e.g. "University". To enable this, add a config in the configs/reactor.js for the 'resourceFocusType' property:
            //added focus on a specific entity type
            'http://live.dbpedia.org/sparql': {
                resourceFocusType: ['http://dbpedia.org/ontology/University'],
            },
This will tell the default Dataset viewer to only display the resources of type dbpedia:University . As a result, you will now only get the list of universities from DBpedia:
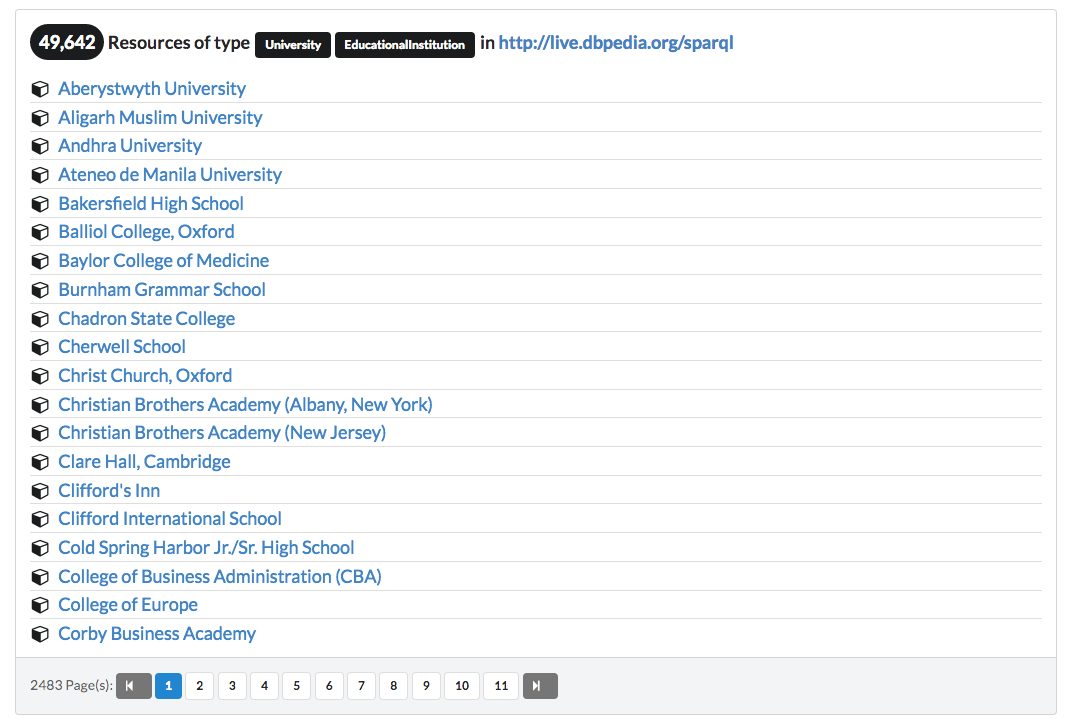
You can also provide multiple focus types if needed. For instance to also list the resources of type dbpedia:EducationalInstitution :
            'http://live.dbpedia.org/sparql': {
                resourceFocusType: ['http://dbpedia.org/ontology/University', 'http://dbpedia.org/ontology/EducationalInstitution'],
            },
This will result in more resources to be dispaled:
The above example was about basic viewing in the dataset level. Another component which can be used to explore data in the dataset level is the faceted browser.
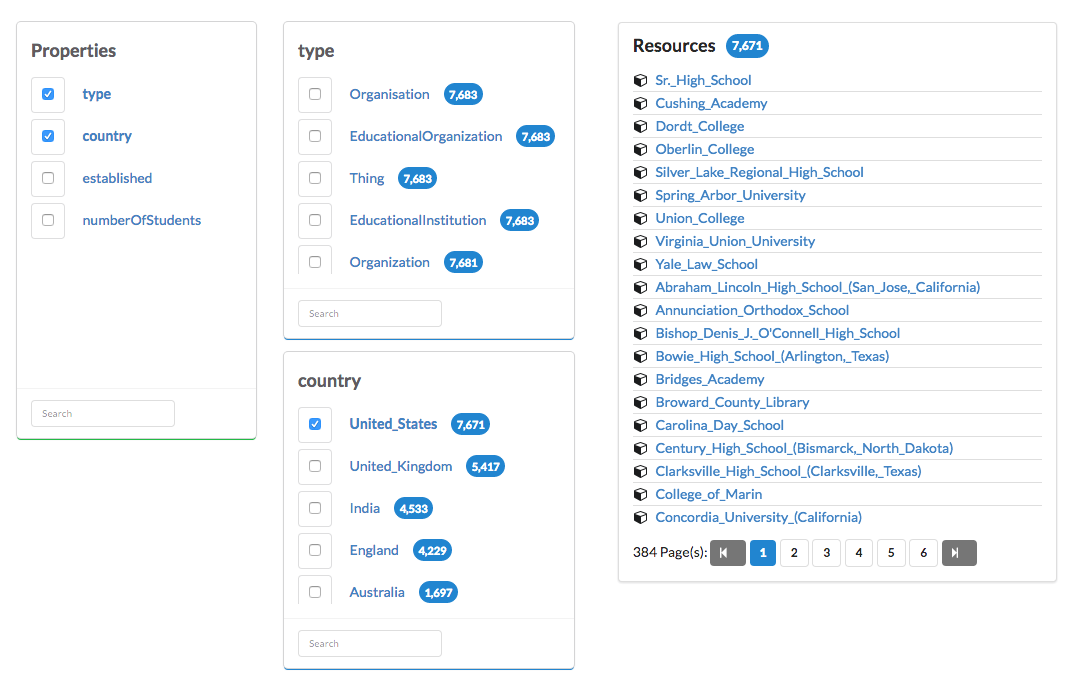
In order to activate the faceted browser, you need to set the config in configs/facets.js file.
Let's add some facets on the DBpedia dataset:
export default {
    facets: {
        'generic': {
            list: [
                'http://www.w3.org/1999/02/22-rdf-syntax-ns#type'
            ],
            config: {

            }
        },
        //adding facets for dbpedia
        'http://live.dbpedia.org/sparql': {
            list: [
                'http://www.w3.org/1999/02/22-rdf-syntax-ns#type', 'http://dbpedia.org/ontology/country', 'http://dbpedia.org/property/established', 'http://dbpedia.org/ontology/numberOfStudents'
            ],
            config: {

            }
        },

    }
};
Here you need to give a list of properties on which you want to create the facets. After adding the facets, you should now see the button next to the dataset's name:

After clicking on the browse button, you should get a list of facets to explore the dataset:
Depending on the size of data and the performance of your triple store, the speed of rendering the selected facets may vary.
Let's do some config in the Resource level...
The previous configs were employing the LD-R Dataset reactor.
We can also have configs on the way resources are rendered on the page.
For example, we can categorize the properties listed for a resource for better readability and understanding.
Going back to our DBpedia example, Let's say we want to present two categories of properties namely 'General' and 'Specific'.
To apply this, you need to open configs/reactor.js and add the resource config as following:
        resource: {
            'generic': {
                //if enabled, will categorize properties in different tabs based on property categories
                usePropertyCategories: 0,
                propertyCategories: [],
                //used when creating random resources
                dynamicResourceDomain: ['http://example.org'],
                resourceReactor: ['Resource']
            },
            //added categories for resource properties
            'http://dbpedia.org/ontology/EducationalInstitution': {
                treatAsResourceType: 1,
                usePropertyCategories: 1,
                propertyCategories: ['General', 'Specific']
            },
        },
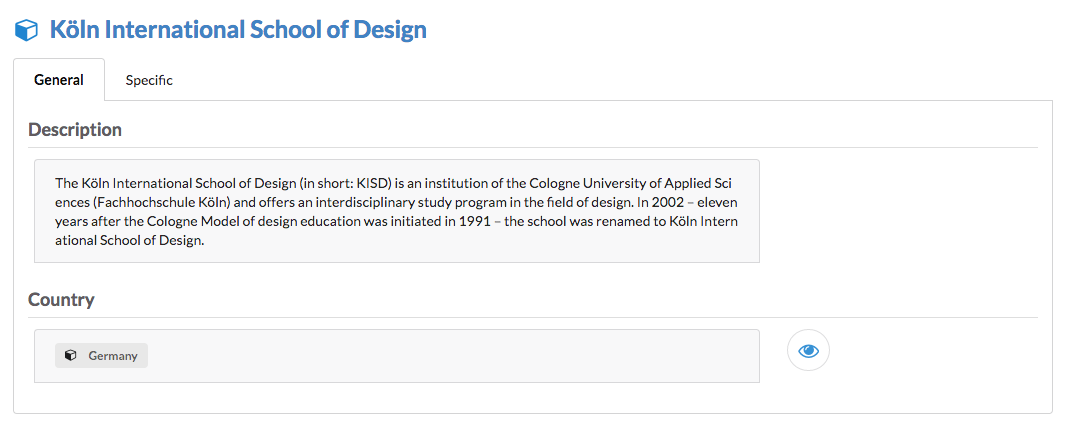
As you see, similar to dataset's config, here you get a generic config for resources which is used when no specific config for resources is defined. There are two ways to config resources: specify the resource by its URI or use the rdf:type property of the resource to apply configs to all resources of that specific type. In our case, we apply the config to all resources of type dbpedia:EducationalInstitution . We enable using property categories and add two possible values for property categories. Now, if you look at an example resource of EducationalInstitution, you will get two different tabs for property categories, but still with empty values. That is because you need to specify which properties should go under which categories.

Let's do some config in the Property level...
Similar to the Dataset and Resource configurations, we can customize the way properties of a resource are rendered on the page.
To do this, you need to go to configs/reactor.js and in the part related to properties, add your changes:
        property: {
            'generic': {
                propertyReactor: ['IndividualProperty'],
                //following are object-based scope:
                objectReactor: ['IndividualObject'],
                //to view/edit individual object values
                objectIViewer: ['BasicIndividualView'],
                objectIEditor: ['BasicIndividualInput'],
                extendedOEditor: ['BasicIndividualDetailEdit'],
                extendedOViewer: ['BasicIndividualDetailView'],
                shortenURI: 1
            },
            'http://dbpedia.org/ontology/abstract': {
                category: ['General'],
                label: ['Description']
            },
            'http://dbpedia.org/ontology/address': {
                category: ['General'],
                label: ['Address']
            },
            'http://dbpedia.org/ontology/country': {
                category: ['General'],
                label: ['Country']
            },
            'http://dbpedia.org/ontology/foundingYear': {
                category: ['Specific'],
                label: ['Funding Year']
            },
            'http://dbpedia.org/ontology/numberOfStudents': {
                category: ['Specific'],
                label: ['Number of Students']
            },
            'http://dbpedia.org/ontology/numberOfGraduateStudents': {
                category: ['Specific'],
                label: ['Number of Graduate Students']
            }
        },
This will move some properties (identified by their URIs) to their corresponding category. We can also change the label in which the property name is displayed. For exmaple, use 'Description' instead of 'abstract'. Now if you view the previous resource again, you will see the properties (if any) with their values under the correct category:
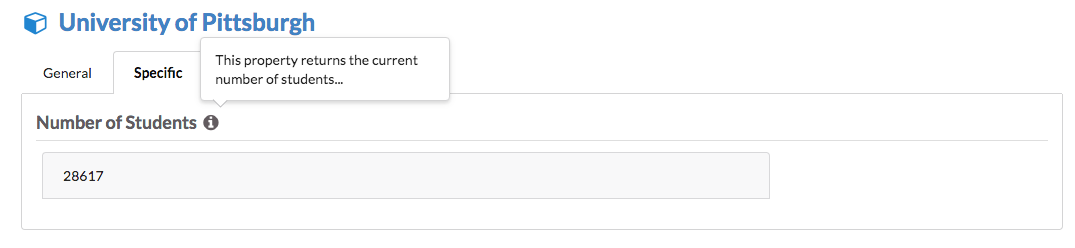
To make the properties and their values more descriptive, we can add a hint next to the property name:
            'http://dbpedia.org/ontology/numberOfStudents': {
                category: ['Specific'],
                label: ['Number of Students'],
                hint: ['This property returns the current number of students...']
            },
The result will look like this:
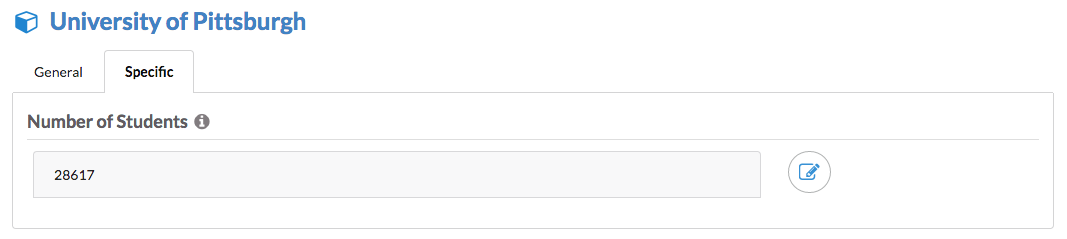
It is not only about viewing data, you can also edit Linked Data...
One of the cool features of LD-R is to allow users to edit Linked Data.
By default, the content on LD-R is read-only. To enable editing of a dataset, you need to add the following config in configs/reactor.js:
            //allow editing of resources
            'http://live.dbpedia.org/sparql': {
                readOnly: 0,
                resourceFocusType: ['http://dbpedia.org/ontology/University', 'http://dbpedia.org/ontology/EducationalInstitution'],
            },
Now, if you go to a resource, you will see the edit button next to the value fields:
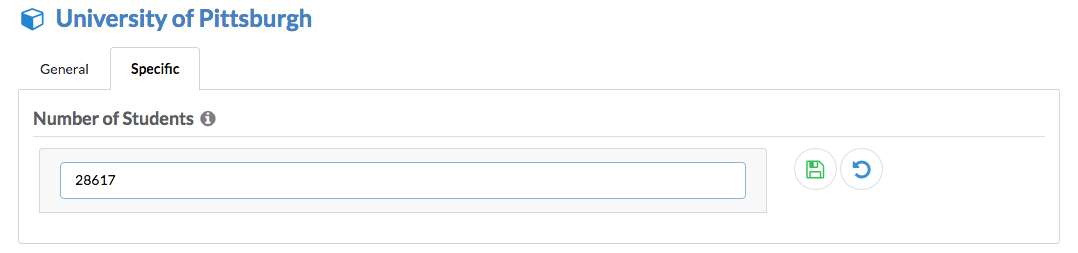
Of course, to be able to save the changes, your SPARQL endpoint should support UPDATE queries. In this case, DBpedia would not be a good example if you try to edit the DBpedia property values (It is worth a try though ;) )!
What if I want to use my custom components to view/edit Linked Data?
That is a good question! LD-R is based on React components therefore it allows you to write your own components (or reuse existing ones) to view/edit/browse Linked Data. Let me show you a quick example:
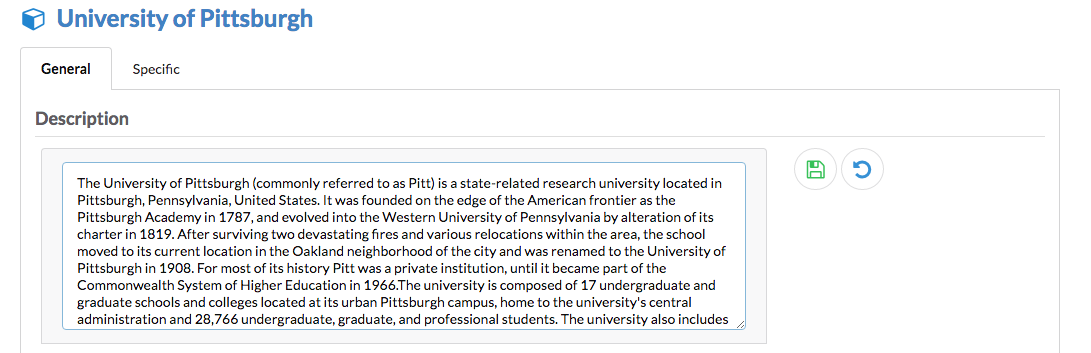
Let's say we want to use a TextArea component instead of default component to edit the value of abstracts in our example dataset. In order to enable this, you just need to specify it in the config for that property:
            'http://dbpedia.org/ontology/abstract': {
                category: ['General'],
                label: ['Description'],
                objectIEditor: ['BasicTextareaInput']
            },
In the above example, you just specify a built-in object editor component for all dbpedia:abstract property values. The result will look like this:
Time to build the app...
After you have finished configuring your LD-R app, you should exit the dev mode and build your app for the production.
To build the app, simply run npm run build command and check the final app at http://localhost:4000.
Windows user might need to try npm run build:windows for that purpose.
The final app, concatenates and minifies all the client-side code for better performance in the Web browser.
Summary
This tutorial aimed to only give you a taste of how LD-R framework works. There are much more features in LD-R than what you just experienced. To know more about LD-R, read this paper and spend some time on the documentation pages. Demo section lists some example datasets to browse.
Edit page on Github